How To Set Up Google Analytics In WordPress For Beginners

Hey, guys basically in this article I am going to teach you that How to Set Up Google Analytics in WordPress so that you can track your website data easily.
One of the most effective ways of marketing online is tracking your results on regular basis. In other words, you need to check how many people are visiting your website on a daily, weekly, or monthly basis. The benefit of this is that it can help you tweak your strategies for maximum profits. Studies have shown that most webmasters don’t know how many people visit their websites. This means they don’t know whether their marketing strategies are working or not.
The solution is Google Analytics
If you aren’t using Google Analytics in your WordPress website at the moment, it is fair to conclude that you are leaving money on the table without knowing. In case you are wondering how this can be installed on your site, there is no need to be worried. This post will be aiming to reveal how you can easily set up Google analytics in any WordPress website today in just a few clicks. This tutorial is perfect for newbie marketers because the steps are easy to follow.
What is Google Analytics?

Before delving into the main details of this post, it is crucial to explain Google Analytics to enable you to know why your website needs it today. This is a platform (software) that enables you to understand more about your target audience. Once it has been installed on your WordPress site, you can tell where visitors are coming from, the pages they are visiting most, their demographic (age and gender) details, the time they spend on your site, and many more.
In a nutshell, Google Analytics provides detailed information on your website traffic. Without it, your traffic generation strategies will be based on guesswork. For instance, if more women are visiting your website and staying longer, you can start creating posts that will help solve their problems. Hope you can see the power of this software.
The setup process demystified
There are various ways or methods of setting up Google analytics. However, this post will be focusing on the simplest method of how to set up google analytics. Just follow the steps below and you will be fine.
Step 1
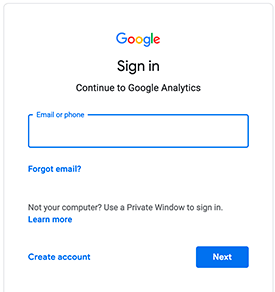
The first thing to do is to sign up for a Google Analytics account. This is quite easy to do especially when you have a Google account already. All you have to do is make use of your username and password. However, you can click on the link which says “Create account” if you don’t have one.
Step 2
Once you have signed in successfully, you will see a page like a picture below. Hit the button which says “Start measuring”.

Step 3
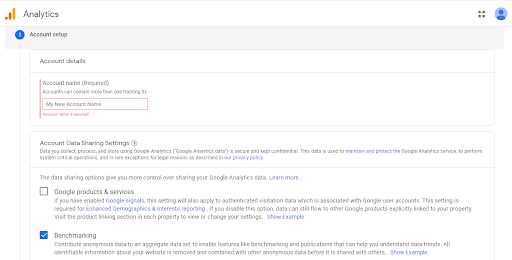
After that, you will be taken to a page where you can fill in details. Just input your name in the “Account Name” field and hit the “Next” button below.
Step 4
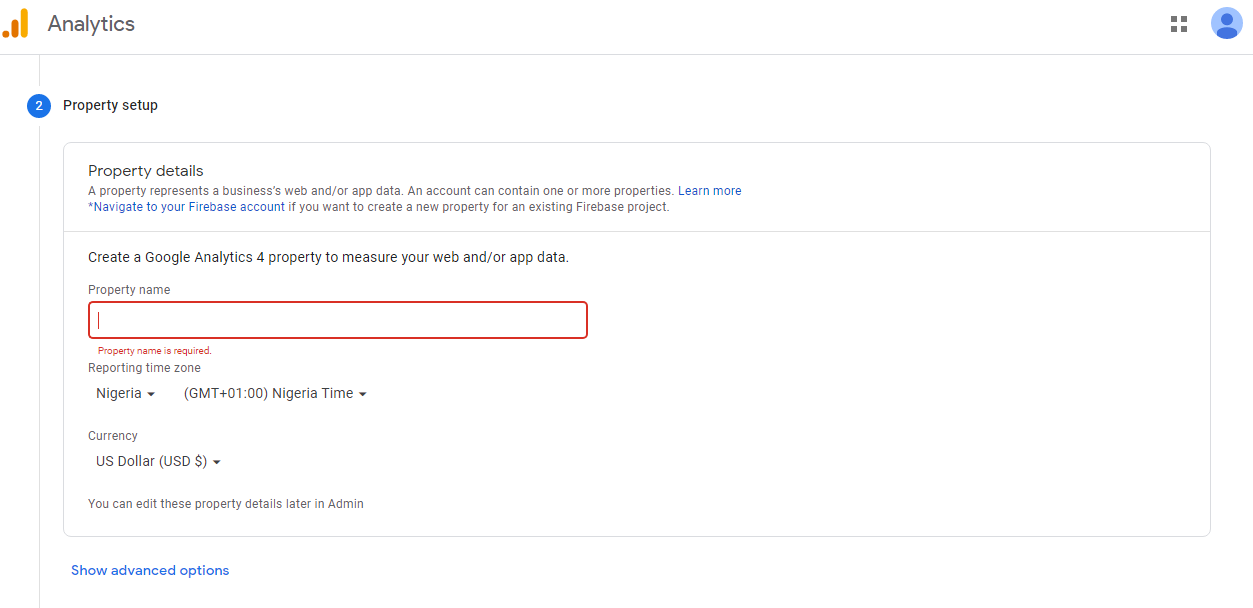
The next stage is “Property Setup”. In the section which says “Property name”, ensure to input your website URL. After that, select your country from the list of countries in the drop-down menu. Now, click on the “Next” button.
Step 5
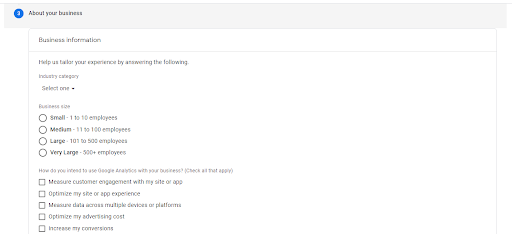
You will then be taken to another page like the one shown below. All you are required to do is tick the appropriate box. It will enable Google to understand what you plan to use this software for. When you are through, click on the “Create” button. An “Agreement” box will pop up, just select your country and hit the “I Accept” button to proceed.
Step 6
After completing Step 5 as explained above, you will be taken to another page that looks like this.
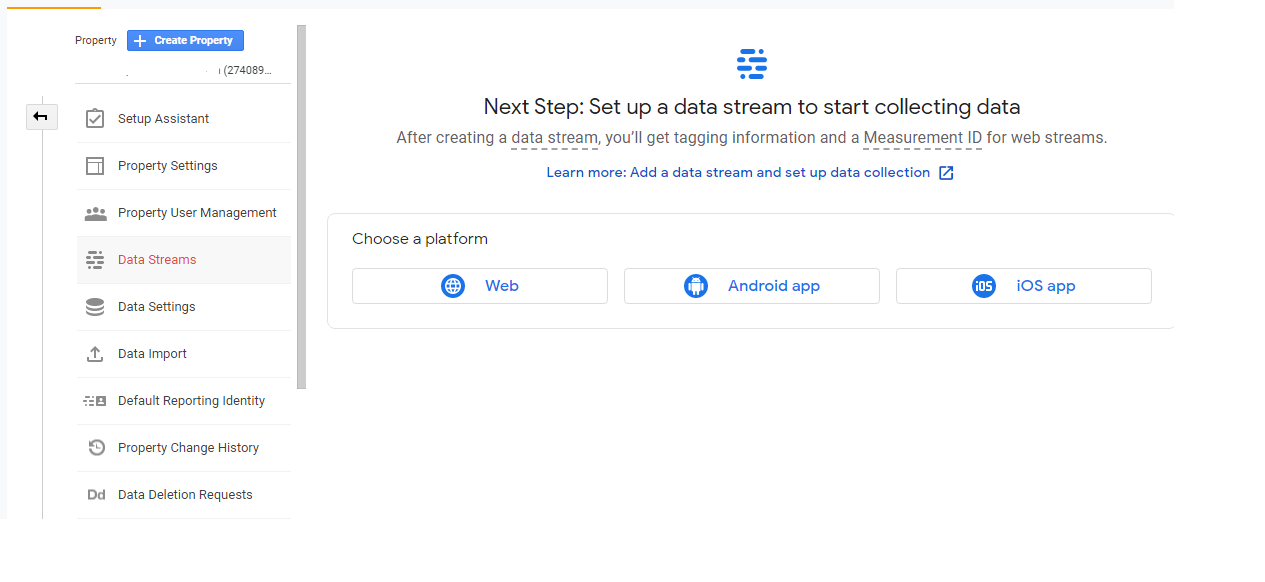
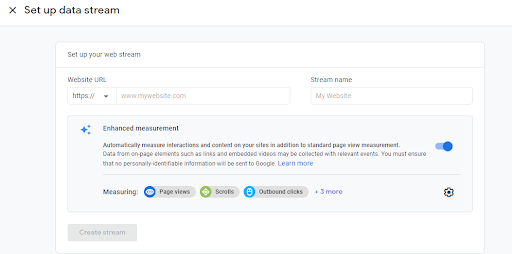
Amongst the various platforms, click on “Web”. After clicking on it, you will be shown a page like this. Please ensure that the “Enhanced measurement” is turned on. This will enable Google Analytics to track activities on your website. Specifically, click on the “page views”. After that, click on “Create stream”.
Step 7
You will be taken to another page that looks like the one below. Just take note of the ID since you will make use of it later on.
![]()
Adding the tracking ID to your WordPress site
In order to do this successfully, you will need to install a plugin on your WordPress site. There are lots of options you can explore for this purpose. However, there is one that seems to stand out – Insert Headers and Footers. This is one of the most popular plugins that you can use in tracking activities that take place on your website. Follow the details below to get started.
Step 8
The first thing that you will have to do is copy the tracking ID in Step 6. Also, install Insert Headers and Footers plugin on your WordPress site. If you don’t know how to install a plugin, check out any tutorial or video online. It is a simple and straightforward process. Once the plugin has been activated, go to Settings —> Insert Headers and Footers. This is where you will have to paste the code (tracking ID) that was copied earlier on.
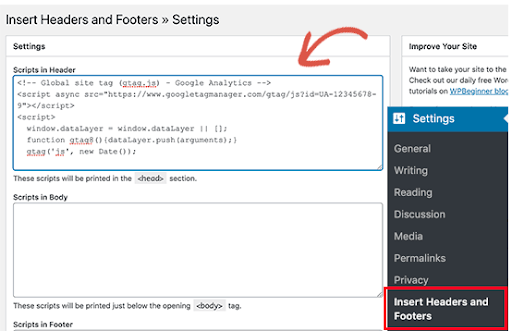
Please take note of where it has been pasted (Scripts in Header). Also, ensure that you have clicked on the “Save” button. Once you are done with this step, it will then become possible to track activities on your site.
What you should know
There are different methods of installing Google Analytics on your website. However, some are too complicated for newbies like you. For instance, there are plugins that require you to understand how codes work. This is the only way you can get maximum results after making use of them. The benefit of this method is that it is quite simple to do. No special skills or knowledge are required for it to be completed.
Final words:
From the above, it is quite obvious that installing Google analytics in your WordPress website is not difficult or complicated as many people are making it sound. All you have to do is follow the steps which have been explained above in this post. Once you get it right, it becomes possible to track all the actions of your visitors and make the right business decisions.

