How to Create Custom Post Types in WordPress in 4 Easy Steps
Custom post types are unique and the most helpful features in WordPress. Particularly in case, you’re searching for an approach to expand your blogging platform into a whole content management structure. In this article, we will learn that how you can Create Custom Post Types in WordPress in just 4 easy steps.
Well, WordPress provides you with already built-in content types. The famous ones are named posts and pages. They act remarkably the same, yet they offer you the chance to put together the content of your site in a more reader-friendly way.
For example:
- Pages: you can use pages to feature the content that remains the same forever. (such as About page and Contact page)
- Posts: you can use posts to publish information that has some expiry date.
If you also want to create custom-type posts in your WordPress and you don’t know the steps, then you have come to the right article.
And also if you want to know why WordPress is one of the best web design platforms then checkout ” Why WordPress is the Best Web Design Platform “.
How can we define Custom Post Types?
Like I said before, WordPress gives you a bunch of built-in post types. They are:
- Pages
- Posts
- Navigation menus
- Attachments
- Revisions
Pages and Posts are included in the frequently used feature of WordPress. From a technical perspective, they work similarly, and the fundamental difference between them is that posts can be used from your wp-administrator through the Posts menu. On the other hand, pages can be used through the Pages option.
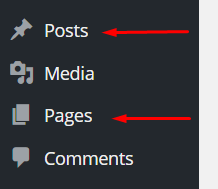
These two have been the exemplary post types accessible in WordPress ever since until the end of time. Now you can make your custom post type rather than the standard Posts and Pages. Custom Post Type – characterized by you – will show up in the wp-administrator directly underneath the Posts and Pages menus in the sidebar. Moreover, you will be able to work with your custom type just like the old posts and pages type.
Now the question arises:
How are Custom Posts Types different from the built-in WordPress post types?
Before reading about how to create custom post types in WordPress you have to make a clear image in your mind that how it is different from the built-in WordPress post types.
First of all, all the post types in WordPress are different from each other and have different features and attributes.
Here we can take an example, the post type is helpful for posting a blog, unlike the page type. The published post appears on the site’s blog; pages don’t appear on the site’s blog.
Additionally, you can relegate a parental page for each new page. There’s no such alternative for posts.
How about we take the case of some attachment page that refers to another post type?
WordPress makes accessory pages for all files that you upload. However, those pages don’t show up in any of your blog pages or even on some other page. They likewise don’t have the choice of a highlighted picture or parent page. Now, if you need those choices, you have to make a custom post with the options you like.
When you make a custom post type then you have to choose its attributes and the extra options that you want your user to encounter when you are publishing your content. If it is made effectively, custom post types show up in your WordPress dashboard just like a content post type with the list of options.
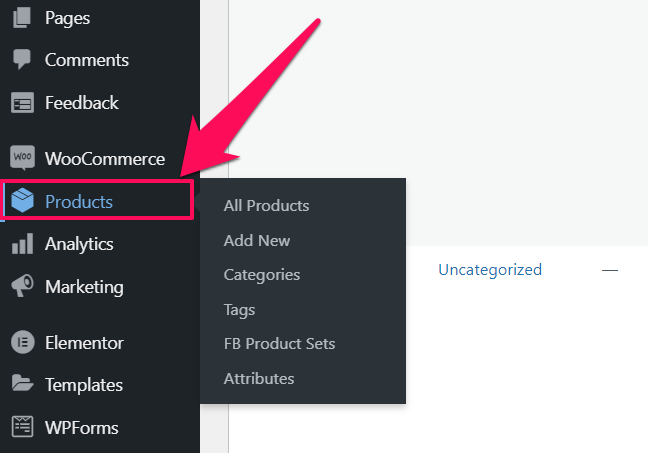
For example, in the screen snip that has been attached below, Products refer to a custom post type.
Now the question arises:
How can we create Custom Post Types in WordPress?
Following are the 4 easy steps to create your Custom Post Type in WordPress.
Step 1 – Installing and Starting the Custom Post Type’s UI Plugins
The basic principle step to create a Custom Post Type is to install and activate your custom post type UI plugins. Here is how it can be done:
- Login to WordPress dashboard.
- Click on the Add New button present under the plugin in the WP dashboard.
- In the search box, find the Custom Post Types UI Plugins.
- Click on the Install Now option to download it.
- Once it is installed, click on the Activate button to start the Plug-in.
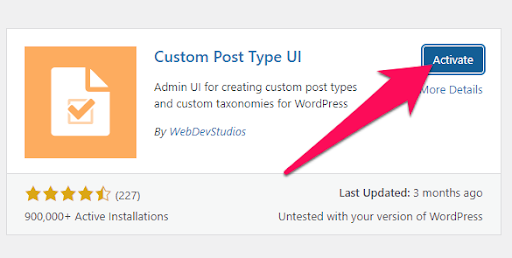
After this, if the plugin is effectively installed, it will automatically send you to its main page.
You can now easily get the plugin in your WordPress dashboard in the left menu. The title of the plugin would be CPT UI.
Step 2 – Creating your Custom Post Types
After the successful installation Plugin, you should organize it correctly to create a complete custom post type. Here is how you can do it:
- In the WordPress dashboard’s left menu, click on the Add/Edit Post Types underneath CPT UI.
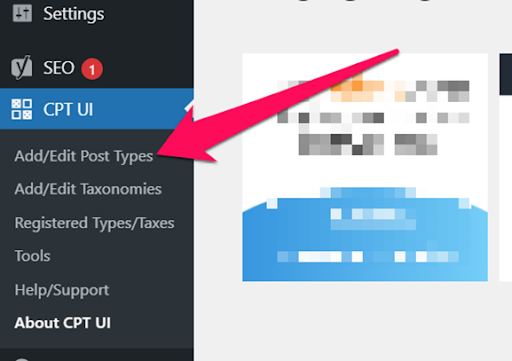
- Add/Edit Post Type subdivision lets you create your custom post type. It consists of three areas such as Basic Settings, Settings, and Additional Labels.
- Start from the Basic Settings.
- There is a field named Post Type Slug; put your URL there. You can use alphanumeric, Latin characters, dashes, and underscores inside the slug.
- Now, give a Label to your Custom Post Type in the Plural Label field. It will be shown on the dashboard and all over the site.
- Click on the link that is present under the Singular Label field. It will mechanically populate the fields in the Additional labels sector built on your labels.
- Now, from here you can add an explanation of your post inside the Post Type Description field that is present in the Additional Labels section. The description option is only visible to you and won’t be shown to the visitors.
- Now moving on to the Settings unit. Here you can organize the properties of your Custom Post Type.
Check up the settings unit and design it according to your desired settings. Once you are done with the settings, click on the Add Post Type option.
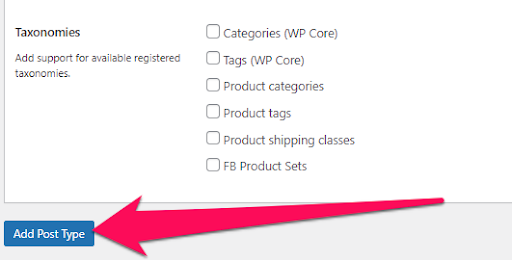
This custom post type will be obvious in your WP dashboard.
Step 3 – Creating the Custom Taxonomies
To create the custom taxonomies, you will be able to practice the CPT UI plugin and relate them to your diverse post types. Here is how you can do it:
- Underneath CPT UI in the dashboard, click on Add/Edit Taxonomies.
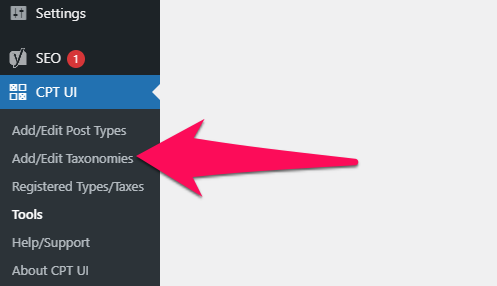
- The settings of Add/Edit Taxonomies are greatly easy and straightforward. You just enter plural labels, singular labels, and slug and connect the taxonomies through your custom post.
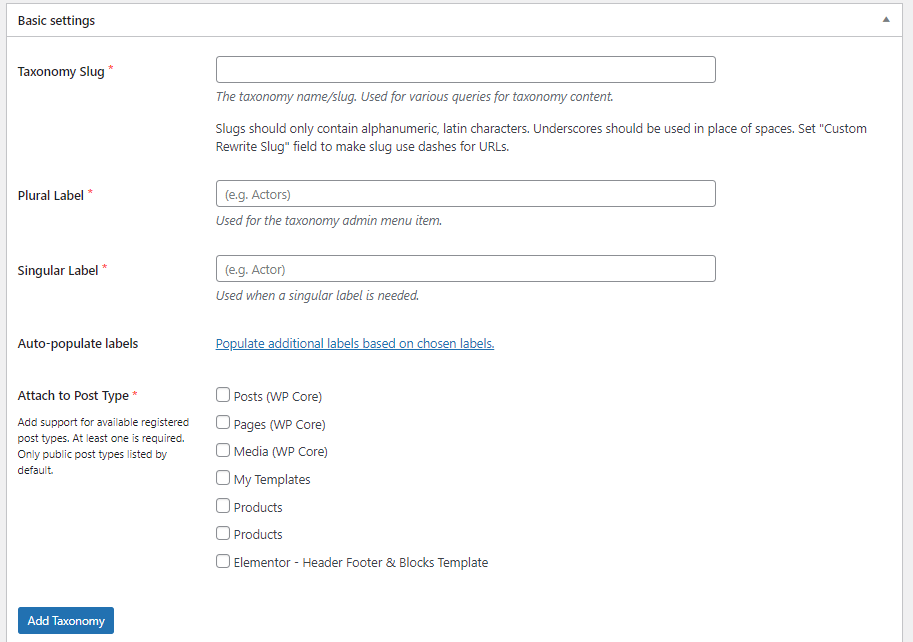
- Click on the link present below the Singular Label field. It will automatically bring the audience to the fields in the Additional tags section built on your labels.
- Now, click on the Add Taxonomy. This will easily create your taxonomy.
Step 4 – Testing of the Custom Post Type
To check if your Custom Post Type works fine, you should create a fresh test post. Here is how it can be done:
- Connect on the Add New option underneath the custom post name tag in the dashboard.
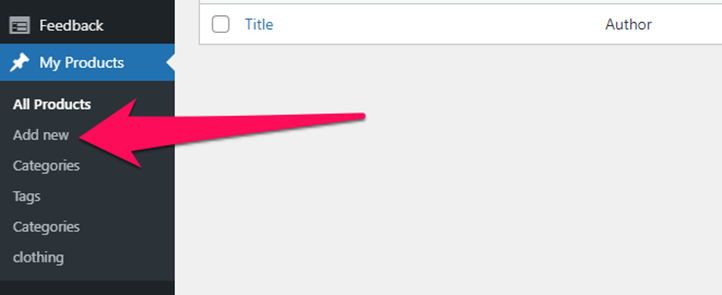
- This click will guide you into the WordPress Editor from where you can confirm your Custom Post Type and check if it contains all the choices that you designated.
- To verify the Custom Taxonomies, you should visit the WP-dashboard, then Custom Post Type Tag, and then Taxonomy Tag.
You can make multiple custom post types according to your needs using the above-mentioned process.
Conclusion:
Custom Post Types is a powerful method to publish various kinds of posts on the WordPress place. In any case, to completely use Custom Post Types, one ought to learn how to utilize Custom Fields in your WordPress.
Merging Custom Fields and Custom Post Types would permit you to make more extensive content with some extra insights concerning your theme.
