How To Build A Freelancer Marketplace Like Fiverr and Upwork

Have you been thinking about creating your own freelancer marketplace like Fiverr or Upwork? Well, fasten your seat belts because here I’m about to break down the easiest way to build your own freelancer marketplace like Upwork or Fiverr.
In order to create a website like Upwork or Fiverr, you need to pay in multiple ways, such as hiring developers, designers, and other experts. It will cost you approximately $1000 – $90,000 or more based on the features you need for your website. It used to be a traditional option to build such websites, but now readymade software/ solutions are changing this trend.
With ready-made solutions, you will get cost-effective, ready-to-start, feature-rich service marketplaces. There are many names who make such platforms but I would like to suggest MakeYourWP, a highly effective solution to launch your own freelancer website. But why MakeYourWP?
MakeYourWP is a kind of platform that lets you create any type of site you want using ready-made templates in a few hours. (trust me even a beginner can do this easily).
Mywp’s freelance marketplace template is more than just a ready-made design, it has all the features you need for a freelance marketplace, pre-installed on the site, so you won’t have to worry about building your site from scratch. Mywp’s freelancer website template has been specially designed and developed to the requirements of people interested in building freelance marketplaces like Fiverr, Upwork, and freelancer.com
From hosting, domain, and design, to setting up, adding features, and managing the website, MakeYourWP handles everything for you. The only thing you need to do is add your own content, and your website will be up and running in no time.
Okay, Now let’s dig deeper into the specifics.
How To Build A Freelancer & Micro Job Portal Website?
In order to make it easier for you, we have compiled a step-by-step guide. Here are 10 steps you’ll need to follow to create your own freelancer marketplace.
Step – 1 Launch your Freelancer Website
In order to create a freelancer website in MakeYourwp, the first step is to launch your site to live on the internet.
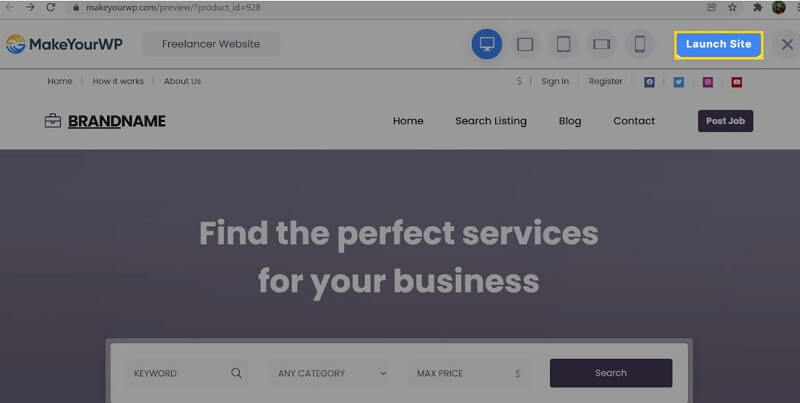
So to launch your site. Just click here. And it will take you to the Freelancer Marketplace template page. You can see how the site looks by clicking the ‘’demo’’ option. Now to get this freelancing website. Just click the ‘’launch site’’
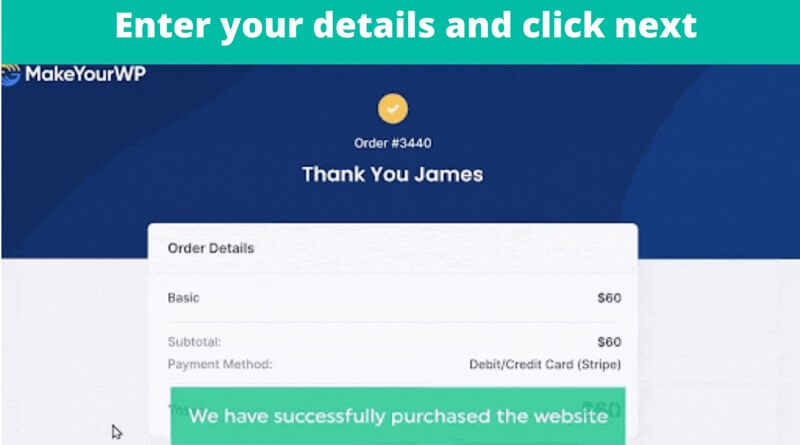
And fill up all necessary information like plans, account information, and payments. And click ‘’Sign up’’. You have now successfully purchase your website.
Then click “launch new site” to launch your site.
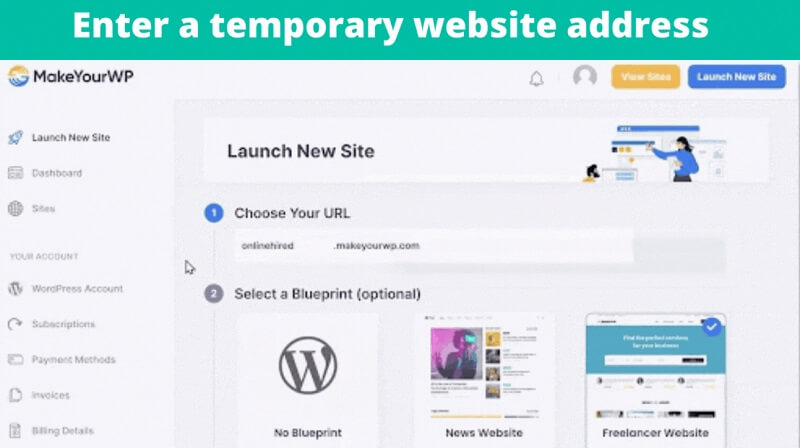
You will then be redirected to this page. Now enter a temporary website address that you want for your site. Consider this as a temporary domain. We will discuss how to get your permanent website address (custom domain name) in the upcoming steps. Next, make sure you have selected the Freelance ready-made template and click “launch the new website”. Now we have successfully launched our brand new website!
Once you have launched your site, The next step is to get the freelancing theme.
Step – 2 Get The Freelancing Site Theme
To get the freelancing website theme just click here and it will take you to the theme page. Now we are going to use this theme to create our own micro jobs websites like Fiverr or Upwork.
So to get this theme, Click ‘’download’’. Fill out the billing information and payment options, and then place your order. We’ve now successfully got the theme for our website. After you get your theme, you will need to activate it on your site. To do so, you have to paste a unique license key into your WordPress dashboard.
You already got your unique license key when you purchased the theme. So to copy that just go to the member area in your theme account there you will find your unique license key. Just copy that and paste it into your WordPress dashboard.
In order to log in to your WordPress dashboard, go to MakeYouraccount and click on admin. Now we are logged in to our site. You can control your entire website from here. Once you have logged in to your WordPress dashboard, click premiumpress and then click settings. Now scroll down and click “license key”. And paste your license key which you have copied from your theme account. Now click ‘’update’’

You have now successfully downloaded and activated your theme. Let’s move on to the next step.
Step – 3 Publish A Job Listing On Your Website
For posting a job on your site you need to follow just 2 steps
- Delete the sample jobs
- Post a job on your site
To delete the sample jobs go to your dashboard and click ‘’All jobs’’. You can see the sample jobs posted on your site here. In order to delete all the jobs, click on all of them and then select ‘Delete’. Then click ‘Update’ to delete all the sample jobs. Once all sample posts have been deleted, we can move on to the second step which is to post a job on your site.
Post a job on your site
To post a job on your site, go back to our dashboard and click “Add Job”. You can now give your job a title and describe the services you’ll offer with it. Then choose your job category, or you can also have the option to add your own category. You can do that by clicking “Manage” and entering the name of your new category.
Then click ‘Add New category’. By doing this you can create your new category according to your needs. Next, enter some keywords related to your job which will help the visitors to find the jobs on your site. Then attach an image you want. When you are finished with this, scroll up and click on the ”details tab” Here you will need to provide your skills and personalities for the ”why choose me’’ section.
By clicking ”manage”, you can also add your own skills and personalities to the list. After you have provided your skills and personalities. Next move on to the pricing tab. When your visitors purchase your services, you can offer them different plans. After you have filled in all the details. Just click ‘’save changes’’. We have successfully posted a job on our website.
Now consider a visitor searching on your site. After finding the job they want, they will be asked to log in or create a new account. Once they have done that, It will take them to the member’s dashboard. Like this, a visitor can create an account and become a member of your site. It’s now possible for them to view any job and order them.
But, we haven’t set up our payment method yet. In order for visitors to purchase on our site, we must first set up our payment method. So, our next step is to set up our payment method to receive payments from our visitors/customers.
Step 4 – Set Up Your Payment Gateway
For setting up a payment gateway on your website. Go to your dashboard
Then go to checkout, Click on payment gateways. You can now see the two payment methods available to you. Select the one you prefer. I’m going to select ‘Stripe’.
It will ask us a few details to connect our stripe account ( if you didn’t have an account on stripe you need to create one and connect it to your website. It’s just a basic setup you can easily do that all by yourself).
Once you are done with this you can receive payments directly to your bank account when someone purchases a job. So now we have successfully set up a payment gateway on our website.
Now if you want to let other freelancers post their services on your website, then you will earn a commission each time a freelancer completes a job. Whenever a customer orders a job on your site, the full amount will be paid to you. Once the freelancer delivers the order, you can keep a portion of the commission and send the rest to the freelancer. ( Most of the freelancer marketplaces like Fiverr, Upwork, and Guru work this way).
So, let’s see how we can allow other freelancers to post a job on our website in the next step.
Step – 5 Allow Other Freelancers To Post Their Job
To allow others freelancers to post a job on our site. Our commission needs to be set up first. So, to set it up. Go to your dashboard. Then go to ‘checkout’ and click ‘House commission’. From here you can set up the commission you want, either from the buyer or seller. After you have entered the commission percentage click ‘save settings’.
Okay! We have now finished setting up our commission process. Next, let’s see how someone can post a job on your site. If a visitor wants to post a job on your website first they must need to create an account as a seller on your site. To create an account click ‘register’ it will take you to the signup page here you have 2 options.
In order to post a job on your site, the visitor must select the seller option and have to fill in the necessary details to create an account. Once they have verified their email. They can access their seller’s dashboard on our site. Here they can manage their jobs and orders. After a seller creates an account, they are now able to post their jobs/services on our site.
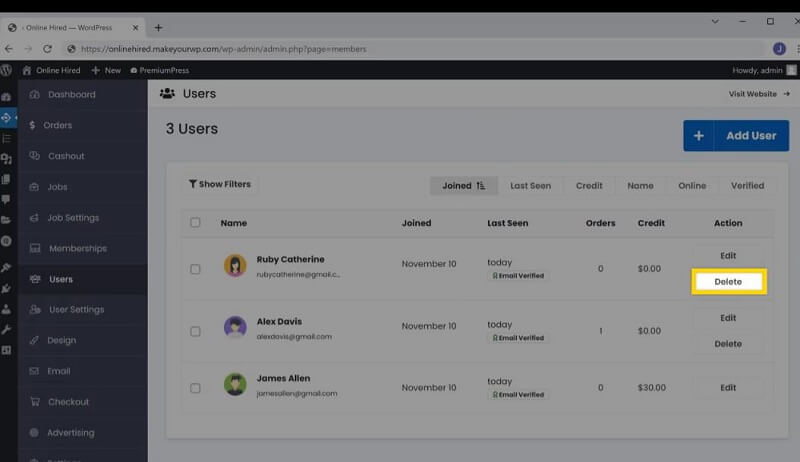
You will receive an email when someone registers as a seller on your site. Now if you want to remove them, you can also delete any user from your dashboard by clicking delete.
Now they can post their jobs/services from their dashboard by clicking the “Post job” option. After that, they have to enter the job details and click ‘save’ to post their job on our site. Until you approve the seller’s job, it will not appear on your site. You will receive an email whenever a seller posts a job.
So, to approve the seller’s job go to your inbox and click on the link which you have received with the mail. It will take you to the jobs page on your dashboard. Here you can see all the jobs which are available and waiting for approval. Now to approve the seller’s job.
Just click ‘Actions’ >> Edit >> Change the status from pending approval to live. Then click the ‘Save changes. That’s it.
Now you have approved the job and it will be displayed on your site. So now visitors can view and purchase the seller’s job/services. Each time a visitor purchases a job, an email will be sent to you and the seller about the purchase. Once a visitor purchases a job, the seller must accept it. (they can accept the order from their seller account on our site).
To do that, first, they need to go to their dashboard >> My orders >> Click ‘view’ >> Then click ‘update’. An Email will be sent to the customer once the seller accepts the job. When the product has been delivered to the customer, the seller can change the job status to ‘delivered’.
The customer will approve the delivery once they have viewed the product and are satisfied with it. Once the customer approves the delivered product, the order will be completed. When the customer approves, the seller will see the amount sent by the customer, as well as the percentage is taken by the admin (which is you). Now the seller has to request the amount from the admin (you).
To do that, the seller has to click on the ‘Balance’ option in their account and send a message request to the admin (you) after selecting his/her preferred payment method. So, this is how the sellers can set up their payment method and request the money from the admin.
Once you have received the money request from the seller. You need to send the money to them according to their preferred payment method after deducting the percentage of your commission. You can do this in your dashboard area under the cashout section. Under the cashout section, you can find the seller’s request. Now to send the payment. All you have to do is, Just click ‘edit’.
There you can see the payment method chosen by the seller. So based on that you have to send the payment to the seller. Once you have sent the payment. Update the status as paid from pending and payment status as complete and click update order. That’s it, Now you have successfully sent the payment to the seller.
By paying you, sellers can also promote their jobs on your homepage. To promote their job on the homepage they need to upgrade. To do that, First, they need to go to their account and click ‘jobs’ >> actions >> upgrade. Moreover, to upgrade the seller needs to pay a certain amount to you. You can set the amount you want.
To do that, Go to the job setting >> Upgrades >> Here you can set the promotion price you want. That’s it. This is how the other freelancers can use our site.
Next, let’s see how you can edit any page on your site.
Step – 6 Edit Your Website Pages
You can edit your website pages according to your need easily through ‘’Elementor’’. To edit any page on your site. Just go to your dashboard, Then go to ‘’Design’’. And click Manage website pages.
Here you can see all your website pages. Now let’s if you want to edit the homepage of your website. Just click the edit icon nearer to the home page. Now it will direct you to the editing section. Here you can easily edit the text, photos, and videos on your site using ‘’Elementor’’. Now edit the text.
Change the text by selecting it and replacing it with the new text. Then if you would like to change the image. Just click on it. You can then upload your image using the options. Likewise, if you want to change the logo.
Go to ‘logos and fonts’ and click ‘select logo’. And then upload the logo you want. Once you’re done with the changes, click ‘’Update’’. So, this is how you can edit any page on your site. Our site is almost ready, and our only remaining task is to obtain a custom domain name for our site.
Step – 7 Get Your Custom Domain
Now your website address looks like this. Instead of this if you want your website to have a simple address, like (which looks more professional) you can get your custom domain name for your site. To set up a custom domain for your site. The first thing you need to do is get your domain name.
Click here to get a custom domain.
It will take you to WebSpaceKit.com. WebSpaceKit is the platform where you can get your custom domain with affordable price ranges. Click this link to get your domain name from Webspacekit.com. After you landed on that page. Enter the domain name you need for your website and check for its availability.
Go ahead and purchase it if it’s available. After you have successfully purchased your custom domain. Now let’s add this domain to your MakeYourWP site. To do that, Go to your MakeYourWP dashboard. Then go to ‘’Domains’’
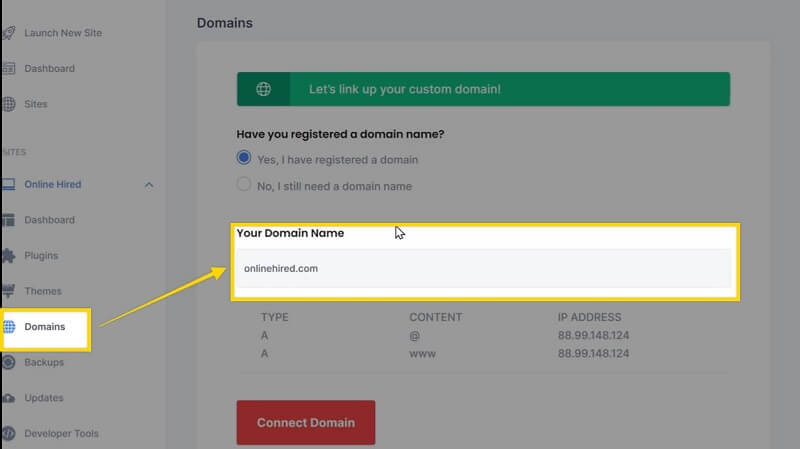
Now enter your newly purchased domain name here. After entering your domain, now we need to add the IP address of your MakeYourWP site to the WSK domain page. In order to do that, Go to your WebSpaceKit account and click domains to add the IP Address.
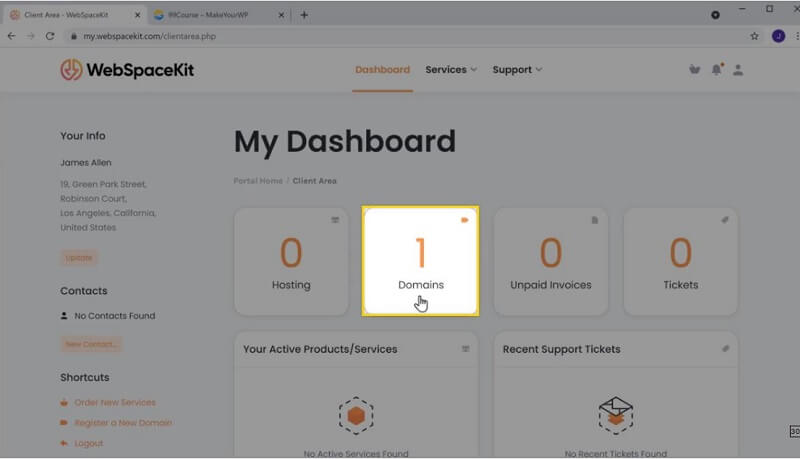
Now select the purchased domain and then click ‘manage DNS’. Copy and paste the IP address from your MakeYourWP site here. Then click ‘Save Changes’. Now go to MakeYourWP and click on ‘Connect Domain’. That’s it.
You have now successfully set up a custom domain for your site. So, this is how you can build a freelancer marketplace like Fiverr or Upwork with makeyourwp’s freelancer website template.
We hope that you have found our blog to be insightful and helpful in your search for building a freelancer marketplace like Fiverr or Upwork.

